用 PySide6 在 Python 中创建图形用户界面 web 应用程序#
本示例演示如何用 Python 创建一个图形用户界面 (GUI) 应用程序,使用 PyMAPDL 计算梁的挠度。
Simulation setup#
以下脚本使用 PySide6 启动图形应用程序:
import sys

from PySide6 import QtWidgets
from PySide6.QtCore import Qt
from PySide6.QtWidgets import (
    QApplication,
    QGridLayout,
    QLabel,
    QLineEdit,
    QMainWindow,
    QPushButton,
    QSlider,
    QVBoxLayout,
    QWidget,
)


class MainWindow(QMainWindow):
    def __init__(self, parent=None) -> None:
        super().__init__(parent)
        self._setup_ui()

    def _setup_ui(self) -> None:
        # General settings for the window
        self.setWindowTitle("PyMAPDL example application")
        self.resize(1000, 500)
        self._widget = QWidget()
        self._layout = QVBoxLayout()
        self._layout.setContentsMargins(0, 0, 0, 0)

        # Create the tabs
        self._tab_widget = QtWidgets.QTabWidget()

        self._tab_preprocessing = QtWidgets.QWidget()
        self._tab_widget.addTab(self._tab_preprocessing, "Preprocessing")
        self._setup_tab_preprocessing()

        self._tab_solver = QtWidgets.QWidget()
        self._tab_widget.addTab(self._tab_solver, "Solver")
        self._setup_tab_solver()

        self._tab_postprocessing = QtWidgets.QWidget()
        self._tab_widget.addTab(self._tab_postprocessing, "Postprocessing")
        self._setup_tab_postprocessing()

        self._layout.addWidget(self._tab_widget)
        self._widget.setLayout(self._layout)
        self.setCentralWidget(self._widget)

    def _setup_tab_preprocessing(self) -> None:
        container_layout = QGridLayout()
        max_qlineedit_width = 250
        self._tab_preprocessing.setLayout(container_layout)

        # Poisson's ration input
        poisson_ratio_label = QLabel("Poisson's ratio: ")
        container_layout.addWidget(poisson_ratio_label, 0, 0)
        self._poisson_ratio_input = QLineEdit()
        self._poisson_ratio_input.setPlaceholderText("Poisson's ratio (PRXY)")
        self._poisson_ratio_input.setText("0.3")
        self._poisson_ratio_input.setMaximumWidth(max_qlineedit_width)

        # Young modulus input
        young_modulus_label = QLabel("Young's modulus: ")
        container_layout.addWidget(young_modulus_label, 1, 0)
        self._young_modulus_input = QLineEdit()
        self._young_modulus_input.setPlaceholderText(
            "Young's modulus in the x direction"
        )
        self._young_modulus_input.setText("210e3")
        self._young_modulus_input.setMaximumWidth(max_qlineedit_width)

        # beam length input
        length_label = QLabel("Length: ")
        container_layout.addWidget(length_label, 2, 0)
        self._length_input = QLineEdit()
        self._length_input.setPlaceholderText("Length")
        self._length_input.setMaximumWidth(max_qlineedit_width)

        # Input for the force exerced on the beam
        force_label = QLabel("Force: ")
        container_layout.addWidget(force_label, 3, 0)
        self._force_input = QLineEdit()
        self._force_input.setPlaceholderText("Load force")
        self._force_input.setMaximumWidth(max_qlineedit_width)

        # Slider for the number of nodes (between 3 and 9)
        number_of_nodes_label = QLabel("Number of nodes: ")
        container_layout.addWidget(number_of_nodes_label, 4, 0)
        self._number_of_nodes_input = QSlider(orientation=Qt.Orientation.Horizontal)
        self._number_of_nodes_input.setMinimum(3)
        self._number_of_nodes_input.setMaximum(9)
        self._number_of_nodes_input.setValue(5)
        self._number_of_nodes_input.setSingleStep(2)
        self._number_of_nodes_input.setPageStep(2)
        self._number_of_nodes_input.setMaximumWidth(max_qlineedit_width - 50)
        self._number_of_node_label = QLabel(
            f"{self._number_of_nodes_input.value()} nodes"
        )
        self._number_of_nodes_input.valueChanged.connect(
            lambda _: self._number_of_node_label.setText(
                f"{self._number_of_nodes_input.value()} nodes"
            )
        )

        # Button to run the preprocessor
        self._run_preprocessor_button = QPushButton(text="Run preprocessor")

        container_layout.addWidget(self._poisson_ratio_input, 0, 1, 1, 2)
        container_layout.addWidget(self._young_modulus_input, 1, 1, 1, 2)
        container_layout.addWidget(self._length_input, 2, 1, 1, 2)
        container_layout.addWidget(self._force_input, 3, 1, 1, 2)
        container_layout.addWidget(self._number_of_nodes_input, 4, 1, 1, 1)
        container_layout.addWidget(self._number_of_node_label, 4, 2, 1, 1)
        container_layout.addWidget(self._run_preprocessor_button, 5, 0, 1, 3)

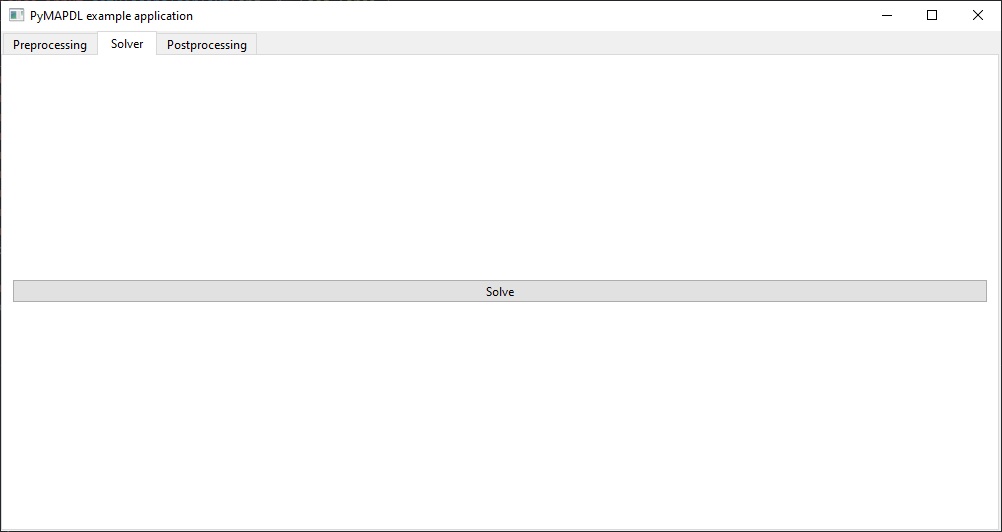
    def _setup_tab_solver(self) -> None:
        container_layout = QGridLayout()
        self._tab_solver.setLayout(container_layout)

        # Button to run the solver
        self._solve_button = QPushButton(text="Solve")

        container_layout.addWidget(self._solve_button)

    def _setup_tab_postprocessing(self) -> None:
        container_layout = QtWidgets.QVBoxLayout()
        self._tab_postprocessing.setLayout(container_layout)
        self._deflection_label = QLabel("Deflection: ")
        container_layout.addWidget(self._deflection_label)


if __name__ == "__main__":
    app = QApplication(sys.argv)
    window = MainWindow()
    window.show()
    sys.exit(app.exec())
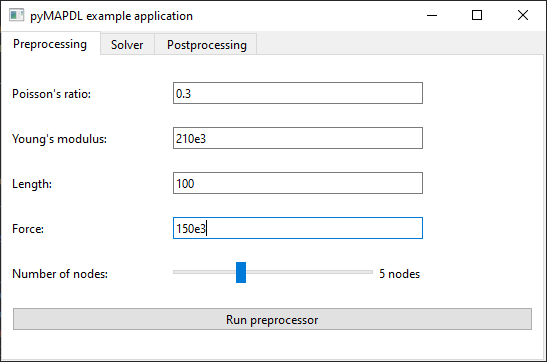
前处理 选项卡包含泊松比、杨氏模量、梁长和模拟节点数的输入字段。

在窗口中添加 PyVista 绘图框架#
首先从 pyvistaqt 包中导入 QtInteractor 类,并从 ansys-mapdl-core 包中导入 MapdlTheme 类:
from pyvistaqt import QtInteractor
from ansys.mapdl.core import MapdlTheme
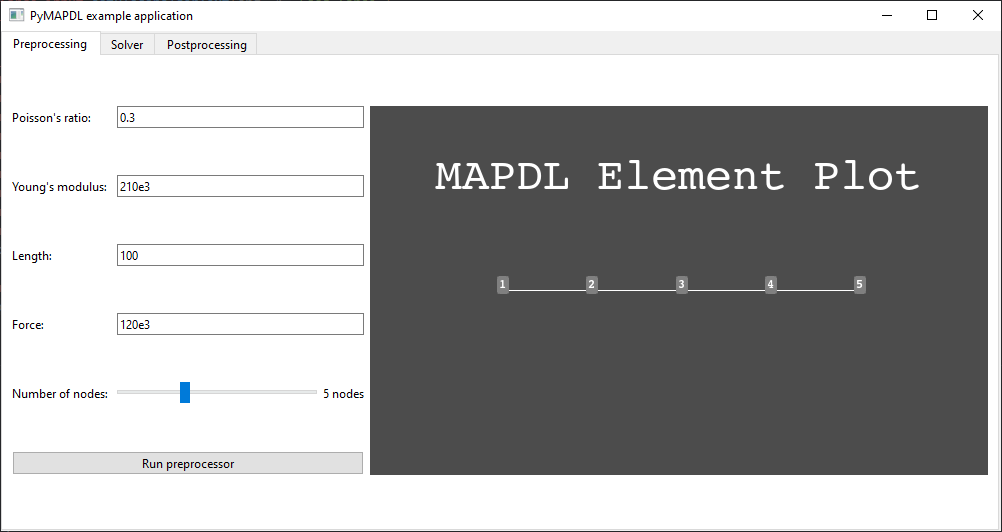
然后,在第一个选项卡上添加一个 plotter :
def _setup_tab_preprocessing(self) -> None:
    ...
    container_layout.addWidget(self._run_preprocessor_button, 5, 0, 1, 3)

    # PyVista frame in the window
    self._preprocessing_plotter = QtInteractor(theme=MapdlTheme())
    container_layout.addWidget(self._preprocessing_plotter, 0, 4, 6, 50)
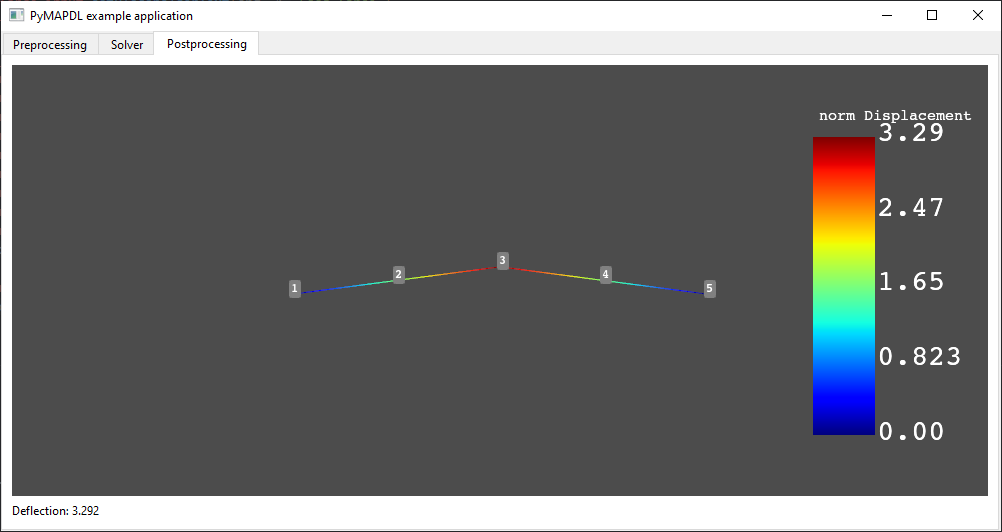
在第二个选项卡上添加另一个 plotter :
def _setup_tab_postprocessing(self) -> None:
    container_layout = QtWidgets.QVBoxLayout()
    self._tab_postprocessing.setLayout(container_layout)
    self._postprocessing_plotter = QtInteractor(theme=MapdlTheme())
    container_layout.addWidget(self._postprocessing_plotter)
    self._deflection_label = QLabel("Deflection: ")
    container_layout.addWidget(self._deflection_label)
最后,确保在关闭应用程序时正确关闭 VTK 部件:
def closeEvent(self, event) -> None:
    self._preprocessing_plotter.close()
    self._postprocessing_plotter.close()
    event.accept()  # let the window close
在 windows 中启动 MAPDL 实例#
在 MainWindow 中为 MAPDL 实例添加一个属性,并导入 launch_mapdl 软件包。
# LIABILITY, WHETHER IN AN ACTION OF CONTRACT, TORT OR OTHERWISE, ARISING FROM,

import sys

from PySide6 import QtWidgets
from PySide6.QtCore import Qt
        self._mapdl.slashsolu()
        self._mapdl.solve()
        self._mapdl.finish()

        # run postprocessing
        self._mapdl.post1()
制定逻辑#
将每个按钮连接到包含逻辑的函数上:
def _setup_tab_preprocessing(self) -> None:
    ...
    # Button to run the preprocessor
    self._run_preprocessor_button = QPushButton(text="Run preprocessor")
    self._run_preprocessor_button.clicked.connect(self._run_preprocessor)
    ...


def _setup_tab_solver(self) -> None:
    container_layout = QGridLayout()
    self._tab_solver.setLayout(container_layout)

    self._solve_button = QPushButton(text="Solve")
    self._solve_button.clicked.connect(self._run_solver)

    container_layout.addWidget(self._solve_button)
现在您可以编写相关函数了:
        container_layout.addWidget(self._poisson_ratio_input, 0, 1, 1, 2)
        container_layout.addWidget(self._young_modulus_input, 1, 1, 1, 2)
        container_layout.addWidget(self._length_input, 2, 1, 1, 2)
        container_layout.addWidget(self._force_input, 3, 1, 1, 2)
        container_layout.addWidget(self._number_of_nodes_input, 4, 1, 1, 1)
        container_layout.addWidget(self._number_of_node_label, 4, 2, 1, 1)
        container_layout.addWidget(self._run_preprocessor_button, 5, 0, 1, 3)

        # PyVista frame in the window
        self._preprocessing_plotter = QtInteractor(theme=MapdlTheme())
        container_layout.addWidget(self._preprocessing_plotter, 0, 4, 6, 50)

    def _setup_tab_solver(self) -> None:
        container_layout = QGridLayout()
        self._tab_solver.setLayout(container_layout)

        # Button to run the solver
        self._solve_button = QPushButton(text="Solve")
        self._solve_button.clicked.connect(self._run_solver)

        container_layout.addWidget(self._solve_button)

    def _setup_tab_postprocessing(self) -> None:
        container_layout = QtWidgets.QVBoxLayout()
        self._tab_postprocessing.setLayout(container_layout)
        # Add a PyVista frame
        self._postprocessing_plotter = QtInteractor(theme=MapdlTheme())
        container_layout.addWidget(self._postprocessing_plotter)
        self._deflection_label = QLabel("Deflection: ")
        container_layout.addWidget(self._deflection_label)

    def _run_preprocessor(self) -> None:
        try:
            poisson_ratio = float(self._poisson_ratio_input.text())
            young_modulus = float(self._young_modulus_input.text())
            length = float(self._length_input.text())
            force = float(self._force_input.text())
        except Exception:
            msg_box = QMessageBox()
            msg_box.setText("Expecting a number")
            msg_box.exec()
            return

        poisson_ratio = float(self._poisson_ratio_input.text())
        young_modulus = float(self._young_modulus_input.text())
        length = float(self._length_input.text())
        force = float(self._force_input.text())

        self._mapdl.clear()
        self._mapdl.verify()
        self._mapdl.prep7()
        self._mapdl.antype("STATIC")
        # create element type
        self._mapdl.et(1, "BEAM188")

        # Create material
        self._mapdl.mp("PRXY", 1, poisson_ratio)
        self._mapdl.mp("EX", 1, young_modulus)
        self._mapdl.sectype(1, "BEAM", "RECT")
        self._mapdl.secdata("10", "10")

        self._number_of_nodes = self._number_of_nodes_input.value()

        # Create the nodes
        for node_num in range(1, self._number_of_nodes + 1):
            self._mapdl.n(
                node_num, (node_num - 1) * length / (self._number_of_nodes - 1), 0, 0
            )

        # Create the elements
        for elem_num in range(1, self._number_of_nodes):
            self._mapdl.e(elem_num, elem_num + 1)

        # Fix beam ends
        self._mapdl.d(1, lab="ALL")
        self._mapdl.d(self._number_of_nodes, lab="ALL")

        #  Apply the force to the node in the middle
        self._mapdl.f(self._number_of_nodes // 2 + 1, lab="FY", value=force)

        # Get the pv.Plotter object from mapdl.eplot function
        # to plot in the window
        preprocessing_plotter = self._mapdl.eplot(
            show_node_numbering=True, show_edges=True, cpos="xy", return_plotter=True
        )

        self._preprocessing_plotter.GetRenderWindow().AddRenderer(


附件#
可通过这些链接下载示例文件:
Original
gui_app.pyscript