ANSYS APDL interactive control examples#
这些示例演示了如何将现有 ANSYS APDL 脚本转换为 Python PyMAPDL 脚本。
您也可以简单地使用 ansys-mapdl-core 中内置的 convert_script() 函数来转换现有的输入文件。
>>> from ansys.mapdl.core import convert_script
>>> inputfile = "ansys_inputfile.inp"
>>> pyscript = "pyscript.py"
>>> convert_script(inputfile, pyscript)
使用 SURF154 单元在杆件上施加扭转载荷#
此 Ansys APDL 脚本使用 SURF154 单元构建一根杆并对其施加扭矩。这是一个静态分析示例。
脚本初始化#
下面是 MAPDL 脚本的开头:
!----------------------------------------
! Input torque applied (moment)
! Input radius, height, element size...
!----------------------------------------
TORQUE = 100
RADIUS = 2
H_TIP = 2
HEIGHT = 20
ELEMSIZE = 1
PI = acos(-1)
FORCE = 100/RADIUS
PRESSURE = FORCE/(H_TIP*2*PI*RADIUS)
下面是相应的 PyMAPDL 脚本,包括初始化 Mapdl 类的实例:
import os
import numpy as np
from ansys.mapdl.core import launch_mapdl

# 在当前工作目录下启动 Ansys,默认工作名称为 "file"
mapdl = launch_mapdl(run_location=os.getcwd())

# 定义圆柱体和网格参数
torque = 100
radius = 2
h_tip = 2
height = 20
elemsize = 0.5
pi = np.arccos(-1)
force = 100 / radius
pressure = force / (h_tip * 2 * np.pi * radius)
创建模型#
下面是创建模型的 APDL 脚本:
!----------------------------------------
! Define higher-order SOLID186
! Define surface effect elements SURF154
! which is used to apply torque
! as a tangential pressure
!----------------------------------------
/prep7
et, 1, 186
et, 2, 154
r,1,
r,2,

!----------------------------------------
! Aluminum properties (or something)
!----------------------------------------
mp,ex,1,10e6
mp,nuxy,1,.3
mp,dens,1,.1/386.1
mp,dens,2,0

!----------------------------------------
! Simple cylinder
!----------------------------------------
*do, ICOUNT, 1, 4
cylind,RADIUS,,HEIGHTH_TIP,HEIGHT,90*(ICOUNT-1),90*ICOUNT
*enddo

nummrg,kp
lsel,s,loc,x,0

lsel,r,loc,y,0
lsel,r,loc,z,0,HEIGHT-H_TIP
lesize,all,ELEMSIZE*2
mshape,0
mshkey,1
esize,ELEMSIZE
allsel,all
VSWEEP, ALL
csys,1
asel,s,loc,z,HEIGHT-H_TIP+0.0001,HEIGHT0.0001
asel,r,loc,x,RADIUS
local,11,1
csys,0
aatt,2,2,2,11
amesh,all
finish
下面是相应的 PyMAPDL 脚本:
# Define higher-order SOLID186
# Define surface effect elements SURF154 to apply torque
# as a tangential pressure
mapdl.prep7()
mapdl.et(1, 186)
mapdl.et(2, 154)
mapdl.r(1)
mapdl.r(2)

# Aluminum properties (or something)
mapdl.mp("ex", 1, 10e6)
mapdl.mp("nuxy", 1, 0.3)
mapdl.mp("dens", 1, 0.1 / 386.1)
mapdl.mp("dens", 2, 0)

# Simple cylinder
for i in range(4):
    mapdl.cylind(radius, "", "", height, 90 * (i - 1), 90 * i)

mapdl.nummrg("kp")

# interactive volume plot (optional)
mapdl.vplot()

# mesh cylinder
mapdl.lsel("s", "loc", "x", 0)
mapdl.lsel("r", "loc", "y", 0)
mapdl.lsel("r", "loc", "z", 0, height - h_tip)
mapdl.lesize("all", elemsize * 2)
mapdl.mshape(0)
mapdl.mshkey(1)
mapdl.esize(elemsize)
mapdl.allsel("all")
mapdl.vsweep("ALL")
mapdl.csys(1)
mapdl.asel("s", "loc", "z", "", height - h_tip + 0.0001)
mapdl.asel("r", "loc", "x", radius)
mapdl.local(11, 1)
mapdl.csys(0)
mapdl.aatt(2, 2, 2, 11)
mapdl.amesh("all")
mapdl.finish()

# plot elements
mapdl.eplot()
求解#
下面是 APDL 脚本的求解:
/solu
antype,static,new
eqslv,pcg,1e-8

!----------------------------------------
! Apply tangential pressure
!----------------------------------------
esel,s,type,,2
sfe,all,2,pres,,PRESSURE

!----------------------------------------
! Constrain bottom of cylinder/rod
!----------------------------------------
asel,s,loc,z,0
nsla,s,1
d,all,all
allsel,all
/psf,pres,,2
/pbc,u,1
/title, Simple torsional example
solve
finish
/post1
set,last
fsum
esel,u,type,,2
SAVE
下面是相应的 PyMAPDL 脚本:
# new solution
mapdl.slashsolu()  # Using Slash instead of / due to duplicate SOLU command
# ansys('/solu')  # could also use this line
mapdl.antype("static", "new")
mapdl.eqslv("pcg", 1e-8)

# Apply tangential pressure
mapdl.esel("s", "type", "", 2)
mapdl.sfe("all", 2, "pres", "", pressure)

# Constrain bottom of cylinder/rod
mapdl.asel("s", "loc", "z", 0)
mapdl.nsla("s", 1)

mapdl.d("all", "all")
mapdl.allsel()
mapdl.psf("pres", "", 2)
mapdl.pbc("u", 1)
mapdl.solve()
使用 PyMAPDL 在 Python 中访问和绘制结果:
# access the result from the mapdl result
result = mapdl.result

# alternatively, open the result file using the path used in MAPDL
# from ansys.mapdl import reader as pymapdl_reader
# resultfile = os.path.join(mapdl.path, 'file.rst')
# result = pymapdl_reader.read_binary(resultfile)

# access element results as arrays
nnum, stress = result.nodal_stress(0)
element_stress, elemnum, enode = result.element_stress(0)
nodenum, stress = result.nodal_stress(0)

# plot interactively
result.plot_nodal_solution(0, cmap="bwr")
result.plot_nodal_stress(0, "Sx", cmap="bwr")
result.plot_principal_nodal_stress(0, "SEQV", cmap="bwr")

# plot and save non-interactively
# (cpos was output from ``cpos = result.plot()`` and setting up
# the correct camera angle)
cpos = [
    (20.992831318277517, 9.78629316586435, 31.905115108541928),
    (0.35955395443745797, -1.4198191001571547, 10.346158032932495),
    (-0.10547549888485548, 0.9200673323892437, -0.377294345312956),
]

result.plot_nodal_displacement(0, cpos=cpos, savefig="cylinder_disp.png")
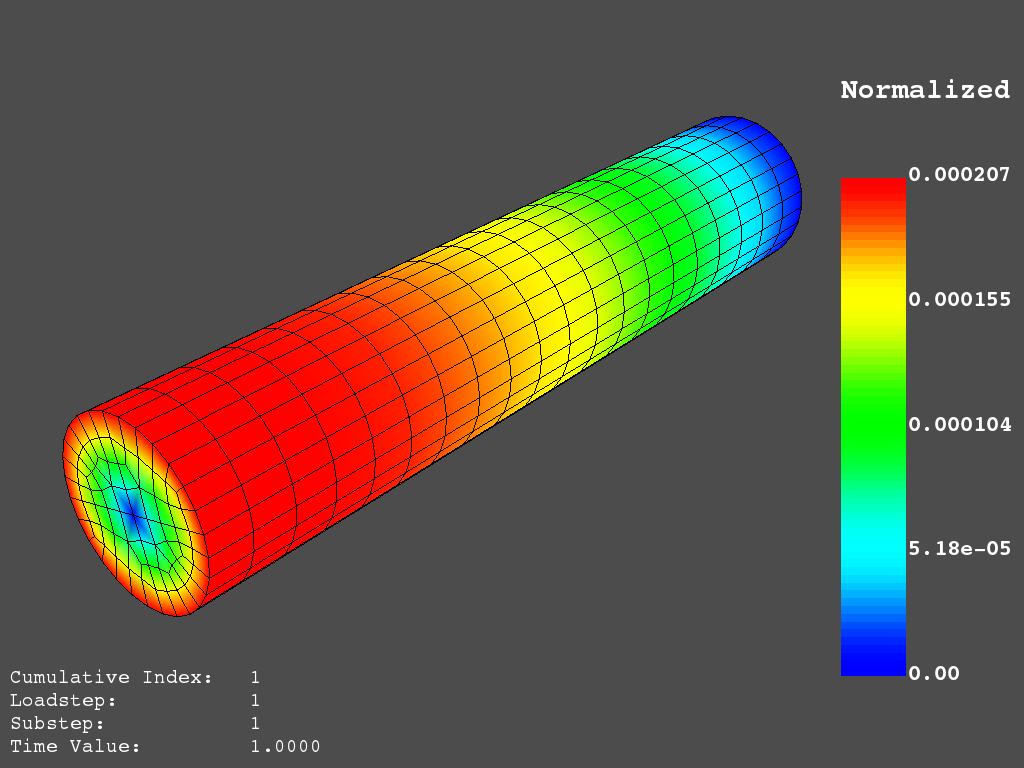
PyMAPDL 的位移结果的非交互式截图#
result.plot_nodal_stress(0, "Sx", cmap="bwr", cpos=cpos, screenshot="cylinder_sx.png")
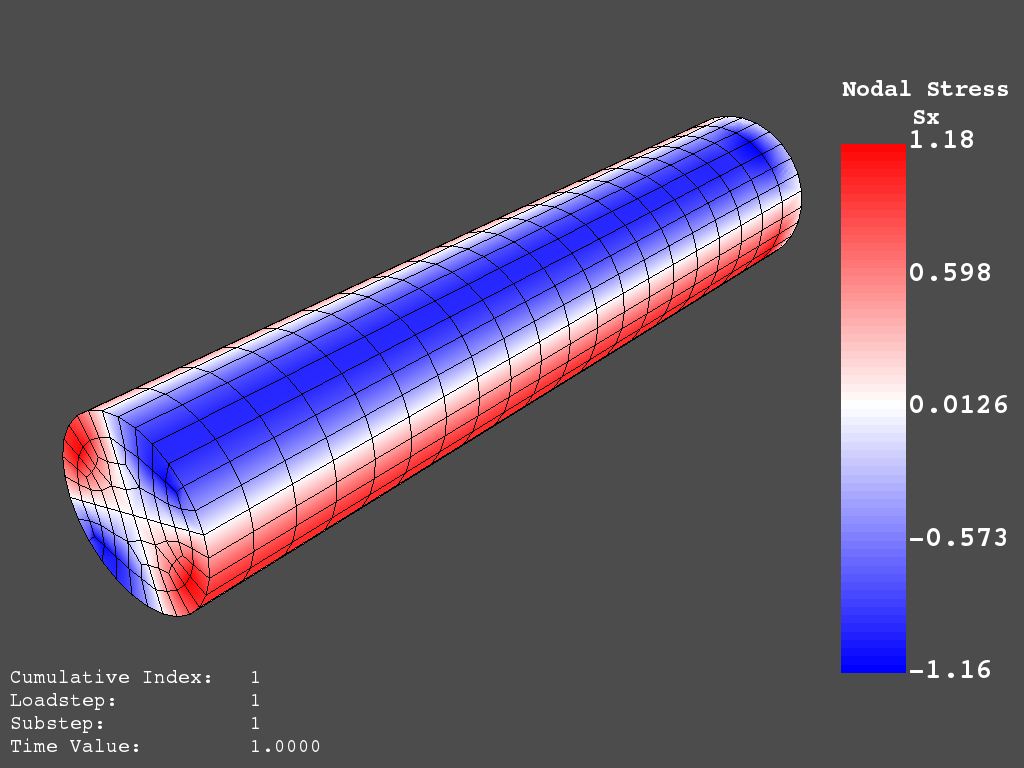
PyMAPDL 中 X 应力的非交互式截图#
result.plot_principal_nodal_stress(
    0, "SEQV", cmap="bwr", cpos=cpos, screenshot="cylinder_vonmises.png"
)
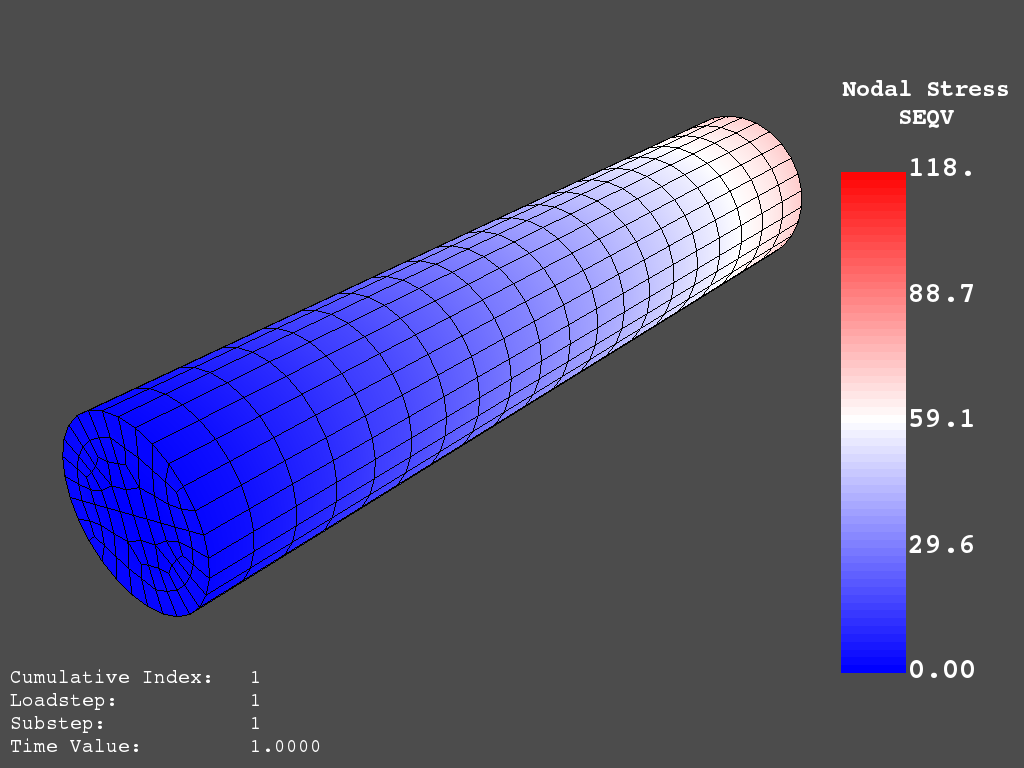
PyMAPDL 的 von Mises 应力非交互式截图#
您也可以使用 Mapdl.post_processing 属性直接从 MAPDL 访问相同的结果:
mapdl.set(1, 1)
mapdl.post_processing.plot_nodal_displacement()
result.plot_nodal_component_stress(0, "Sx")
result.plot_nodal_eqv_stress()
运行输入文件–“点焊 SHELL181” 示例#
这个 MAPDL 示例演示了如何对三片薄金属板进行点焊连接建模。在这里,只需使用 PyMAPDL 界面运行完整的输入文件。
!----------------------------------------
! Example problem for demonstrating
! Spotweld technology
!----------------------------------------
!
!----------------------------------------
! Originated in 9.0 JJDoyle 2004/09/01
!----------------------------------------
/prep7
/num,0
/pnum,area,1

k,1,2,10,
k,2,10,10
k,3,10,0.15
k,4,14,0.15
!
l,1,2
l,2,3
l,3,4
lfillt,1,2,3
lfillt,2,3,2
!
k,9,,
k,10,11,
k,11,15,
l,9,10
l,10,11

k,12,,10
lsel,s,,,6,7
AROTAT,all,,,,,,9,12,12,1,

lsel,s,,,1,5
AROTAT,all,,,,,,9,12,12,1,
areverse,1
areverse,2

asel,s,,,3,7
ARSYM,Y,all, , , ,0,0
allsel

!********
!define weld location with hardpoint
!********
HPTCREATE,AREA,7,0,COORD,12.9,0.15,-1.36,

/view,1,1,1,1
gplo
!
et,1,181
r,1,0.15
r,2,0.1
!
mp,ex,1,30e6
mp,prxy,1,0.3
!
esize,0.25
real,1
amesh,1
amesh,2
real,2
asel,s,,,3,12
amesh,all
!
lsel,s,,,1,9
lsel,a,,,12,17
lsel,a,,,26,38,3
lsel,a,,,24,36,3
nsll,s,1
wpstyle,0.05,0.1,-1,1,0.003,0,0,,5
WPSTYLE,,,,,,,,1
wpro,,-90.000000,
CSWPLA,11,1,1,1,
csys,11
nrotat,all
d,all,uy
d,all,rotx

csys,0

lsel,s,,,23
nsll,s,1
d,all,uz

lsel,s,,,17
nsll,s,1
d,all,uz,4

ALLSEL
/view,1,1,1,1
/eshape,1
ksel,s,,,33
nslk,s,1
*get,sw_node,node,,num,max

/solu
allsel
nlgeom,on
time,4
nsubst,10,25,5
outres,all,all
fini

!------------------------------------
!build flex spotweld with BEAM188, run the solution,
!and post process results
!------------------------------------
fini
allsel
/prep7
mp,ex,2,28e6
mp,prxy,2,0.3
!
SECTYPE,2,beam,csolid
SECDATA,0.25
!
et,2,188
type,2
mat,2
secnum,2

SWGEN,sweld1,0.50,7,2,sw_node,,
SWADD,sweld1,,12

/solu
allsel
nlgeom,on
time,4
nsubst,10,25,5
outres,all,all
solve
FINISH
>>> from ansys.mapdl.core import launch_mapdl
>>> mapdl = launch_mapdl()
>>> mapdl.input("spot_weld.inp")
下面是使用 ansys-mapdl-reader 软件包访问运行 MAPDL 分析后结果的 Python 脚本。
>>> from ansys.mapdl import reader as pymapdl_reader
打开结果文件,绘制 时间步 = 3 的位移图
>>> resultfile = os.path.join(mapdl.directory, "file.rst")
>>> result = pymapdl_reader.read_binary(resultfile)
>>> result.plot_nodal_solution(2)
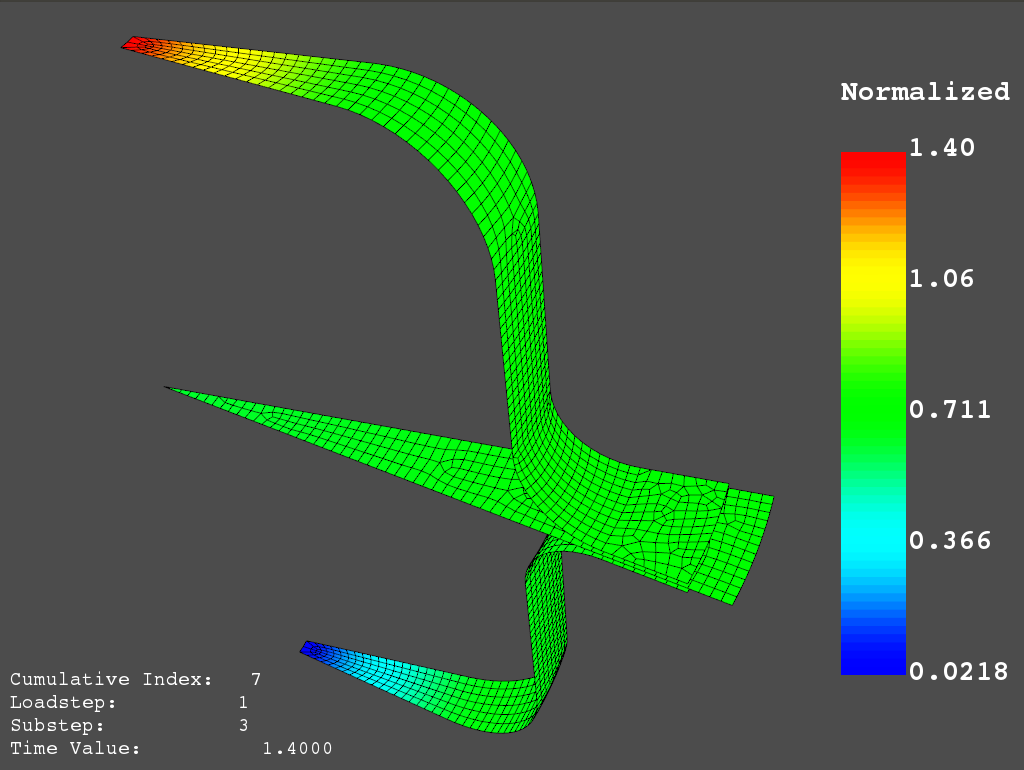
Spot Weld: Displacement#
获取 时间步 = 0 时的节点和单元分量应力。绘制 Z 方向的应力图。
>>> nodenum, stress = result.nodal_stress(0)
>>> element_stress, elemnum, enode = result.element_stress(0)

绘制 Z 方向应力图:模拟点焊的接触单元上的应力

>>> result.plot_nodal_stress(0, "Sz")
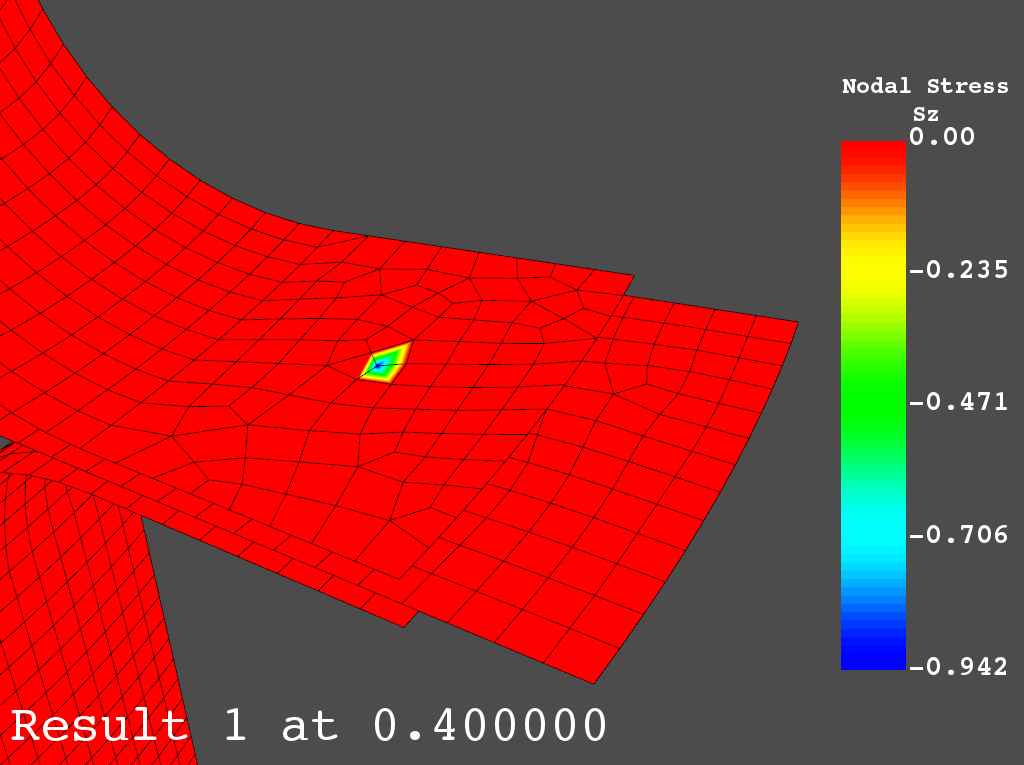
Spot weld: Z stress#
获取主节点应力并绘制 von Mises 应力图
>>> nnum, pstress = result.principal_nodal_stress(0)
>>> result.plot_principal_nodal_stress(0, "SEQV")
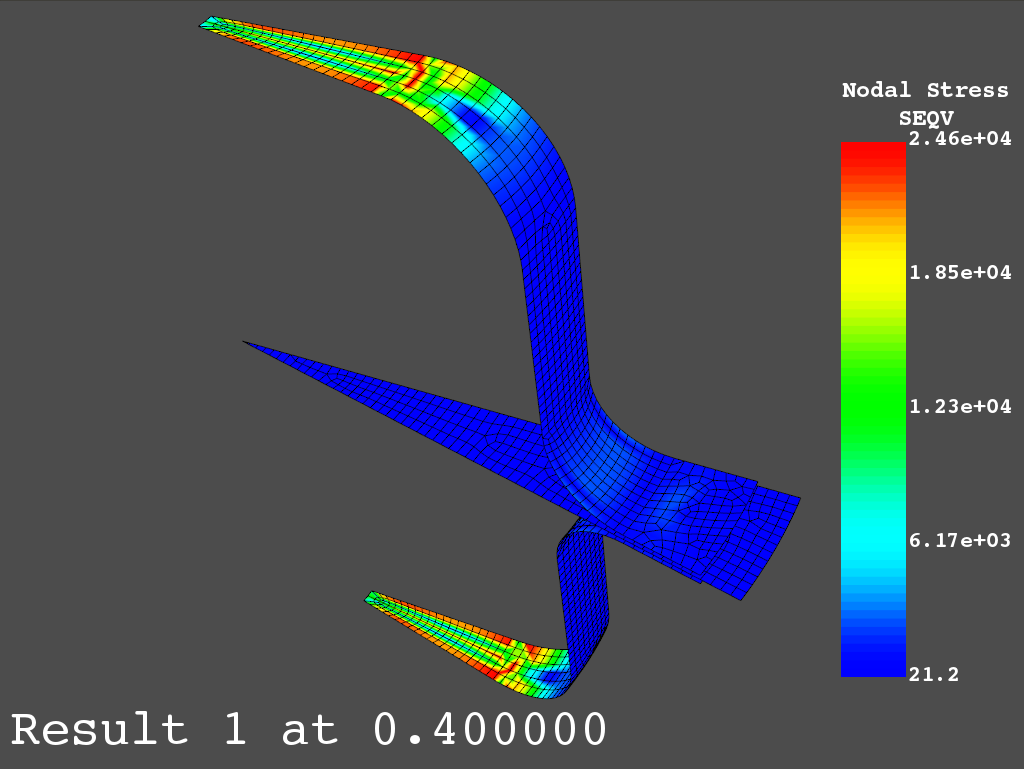
Spot weld: von Mises stress#